It’s this special time of the year again where we have time to fiddle with things that came to us and/or we are interested in.
For me a Zynthian v5.1 assembly kit became the target of this years focus. (For now, think of it as musical Lego for grown-ups.)
 Zynthian v5.1 assembly kit, ready for built
So, what really is a „Zynthian“?
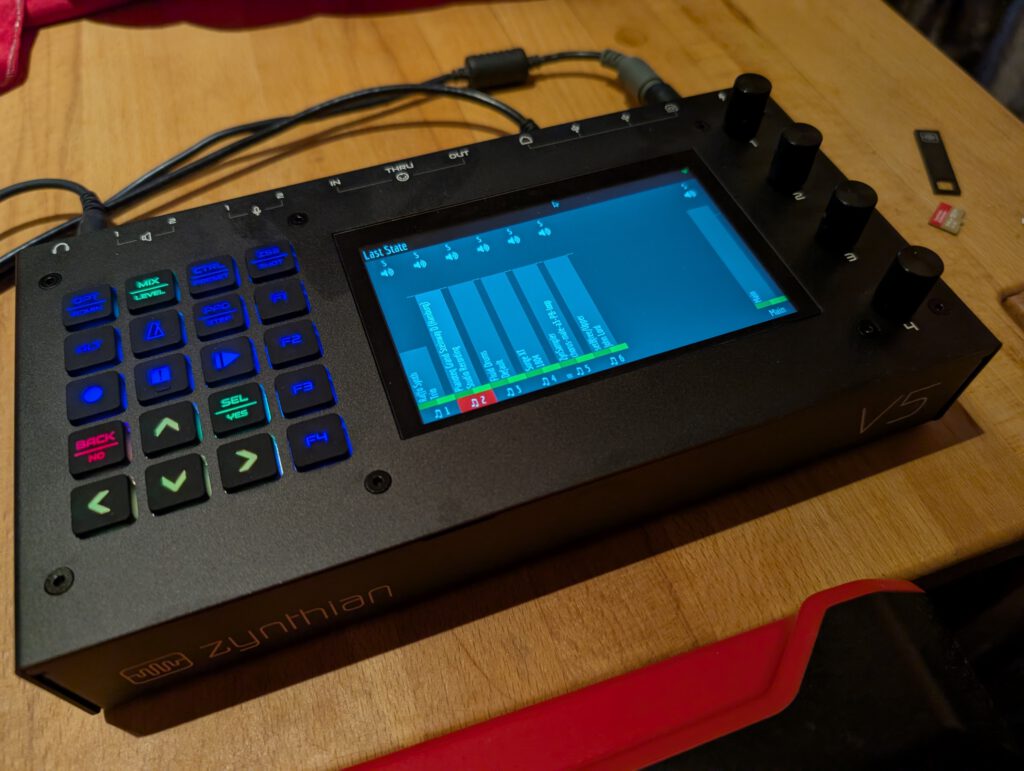 Assembled, running Zynthian
 of a Zynthian") Backside (=connections) of a Zynthian
Backside (=connections) of a Zynthian
A Zynthian is an embedded Linux system (based on Raspian Linux), specialised for music related tasks, with MIDI and balanced audio I/O among others. And it’s open source, not just the software, but also the hardware. It consists of a vast collection of modules/engines (currently)
 Engines view in webconf
most of which are open source, but you’ll also find the possibility to run Pianoteq (in a test version or activating your license) or even a DSP56300 emulator (which enables you to start i.e. the firmware of an Access Virus if you are entitled to use it), lots of open source audio and midi effects, loopers, tuners, mod-ui, pure data etc. and even an integrated internet radio.
Checkout the Zynthian Website yourself, the feature list is vast and it doesn’t make sense to repeat here every single feature, except the most important.
Think of it as a multi sound expander, multi effect, mobile sequencer/DAW, live looper, tuner, metronome, internet radio [what ever you can think of and implement].
The whole package is a combination of a RaspberryPi, a soundcard and a case with potis, knobs and touch display. If you’re keen on what it feels like without investing lots of bucks you maybe want to start with a testbed, just take an existing RaspberryPi (5 would be the most current and powerful, but 4 would work also with some limitations), add keyboard, mouse, display and a soundcard (USB maybe?) get the bare metal OS, dd it to a µSD and boot! Or if you have an old synth with a good keyboard but otherwise don’t know what to do with it, simply directly integrate a Zynthian! It’s up to you!
As you can see above, the Zynthian also provides a webconf module for updating, managing the available engines and even fire up a VNC version of the regular Zynthian touch display along with another VNC to access the graphical frontends of the currently activated software. Not to mention being able to access the system via ssh.
") Mixer view of Zynthian UI (via VNC)
Mixer view of Zynthian UI (via VNC)
 GUI view via VNC
As the RPi also provides USB, WiFi, Bluetooth and an ethernet port you can also attach all sorts of USB devices like soundcards, MIDI interfaces, etc., start a WiFi hotspot, attach i.e. BLE-MIDI hardware, or even use it with MIDI 2.0 (It provides standard MIDI in, out and thru as well of course)!
For those of you having struggled with setting up a Linux audio system based on Jack Audio Connection Kit (the de facto standard for implementing pro audio on Linux), Zynthian comes with a pre-built environment with Jack already running.
So you may ask why should I build such a beast by myself? Because I can? 😉
To be honest, there are commercial products nowadays which cover similar functionality in parts, but most of them are much more expensive while definitely not being as flexible and extensible as a Zynthian. And most important, they normally are neither open source nor open hardware.
One of the best things about a Zynthian is the active community, which not only provides support but also responds to bugs and suggestions for enhancements. And that means it is a system that is constantly evolving and reinventing itself to push the boundaries of what is possible! And you as a user are able to participate!
Out of the box, Zynthian is intended to start from a µSD card, but as I used a RasberryPi5 (with 8G of RAM) I could also add a NVME hat, perfectly fitting into the case for being able to boot from an attached 1TB NVME card. By using a script from one of the devs, I was able to simply copy the contents of the µSD to the NVME and boot from it. So now I’m able to have a stable version (ORAM) for regular use on the NVME and if I want to test bleeding edge I simply can insert and boot from a µSD with the testing (VANGELIS) version of Zynthian.
I fixed the NVME hat in the case by attaching two 5mm spacers to the hat by screws and afterwards used superglue on the other (case) end of the spacers to glue them to the case.
If you plan on assembling a v5.1 kit, decide before if you maybe want to use a NVME hat in the future. It’s definitely a lot easier to connect the needed flat cables during initial setup than doing it later in an assembled state. Ok, you can still disassemble the whole unit and redo all the steps (take care for new thermal pad in this case to ensure an optimal thermal flow between heat sink and case), but the best advice during the assembly also applies here: Think twice before each step!
But being able to do this is one of the advantages of the delivery form as assembly kit (besides understanding how it works and being able to fix things yourself).
BTW: I reused an old Lenovo power supply with a suitable adapter for providing the needed power. The integrated power supply in the Zynthian takes between 12V and 48V, so the 20V are sufficient and the Lenovo power supply provides enough headroom (in Amperes) for attaching USB powered devices as i.e. my Akai MPK 225.
The heatsink provided by the v5.1 assembly kit ensures a thermal flow from the heat generating parts of the RPi5 to the aluminium case of the Zynthian to avoid the need of a fan wich works quite good. The result is a silent system not getting overly hot during normal usage compared to my bare metal RPi5 testbed with a dedicated heatsink with intgerated fan which works with comparable workload at a clearly higher temperature.