2022 my daughter got an E-MU XK-6 for christmas I previously shot on ebay for me, to get hands on the included XROM soundrom. As a side note, I also tested the XK-6 without any soundrom installed and it would still being functional as MIDI-keyboard with enhancement possibilities, but I decided to keep her life easier as a beginner… 😉 So for her being able to directly start with playing with the synth, I built a (more generic) Composer ROM into the XK-6.
However, she found the keybed’s playing noises were way too loud, which I could only confirm.
Conclusion: The keybed (which is in fact a Fatar TP/9S) had to become more quiet!
Here’s what I did:
- Check what triggers the sound, pressing and/or releasing, where does it come from?
In my case it was just the release, to be exact the moment the key reached the endposition and hit the end stop.
The vibrations also seemed to be increased by the base plate of the keyboard enclosure.
- Identify the sound triggering parts (which need to be damped somehow)
- While thinking about a solution keep in mind, that the damping could harm useability of the keys or their end positions.
In my case I decided to apply a little bit of fleece to the area in each key, which contacts the end stop plus putting adhesive insulating tape (plastic foam with adhesive tape) on the inside of the enclosure base plate to damp resonant vibrations there as well. This lowered the end positions of the keys a little bit, but most important, evenly.
- Take some time to identify the correct screws to be released to open the enclosure. Some are for the side parts and the sound rom compartment (which you both don’t need for this task), some for opening the enclosure and some are for the mounting of the keybed (yes, you’ll need both of them). Don’t forget the 5 small case screws on the backside of the case! Afterwards, you should be able to simply fold the enclosure top backwards.
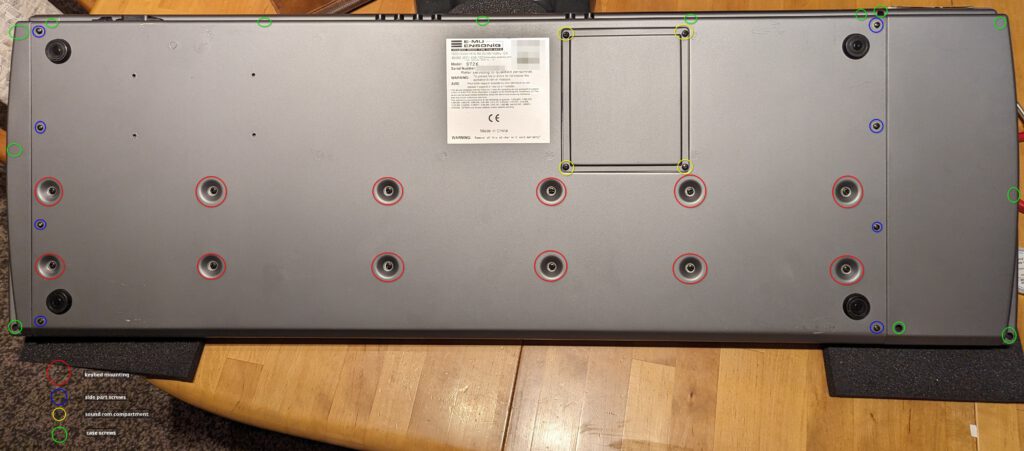 case backside, enlarge to view the descrition of the screws
- As mentioned before, at least I had to remove the mounting of the keybed as well to reach the backside with the springs. If the keybed is unmounted (and you didn’t remove all the cables like me), be careful not to damage them. Especially the aftertouch strip on the left side doesn’t give much room for movement.
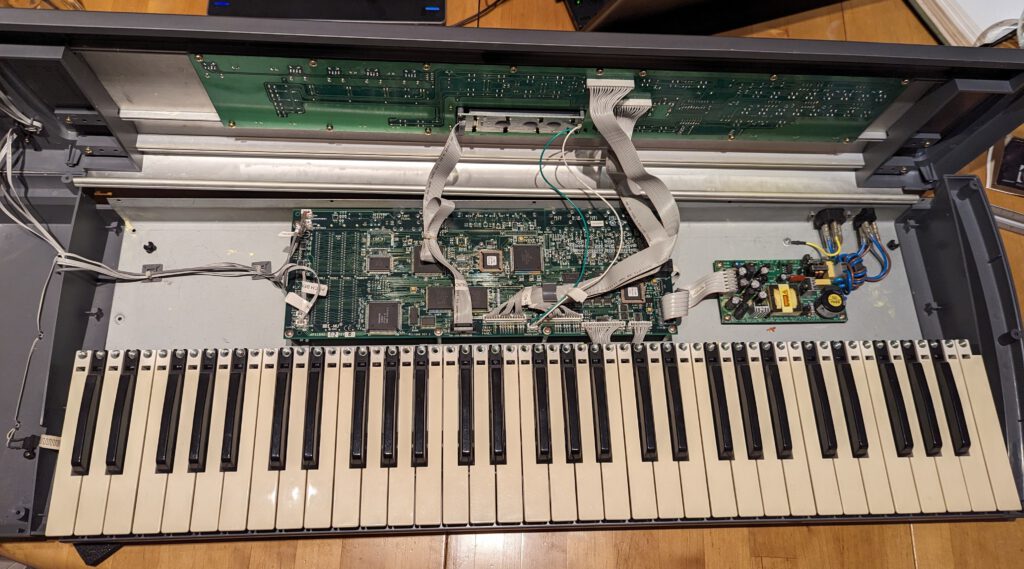 case opened
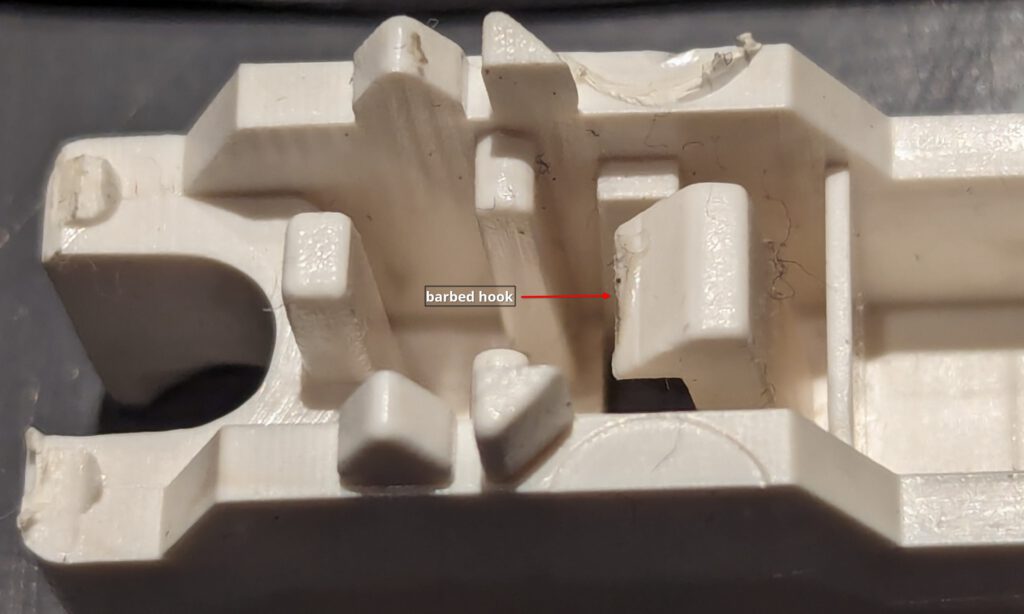
- To detach a key, remove the spring on the backside of the key. I used a small screwdriver which I pushed between the spring rings at the top to lift the spring up and out. Afterwards you need to carefully release a small barbed hook through the opening beneath the spring holder. Again I used the screwdriver to push it slightly towards the front end of the key. Now you can simply lift out the key.
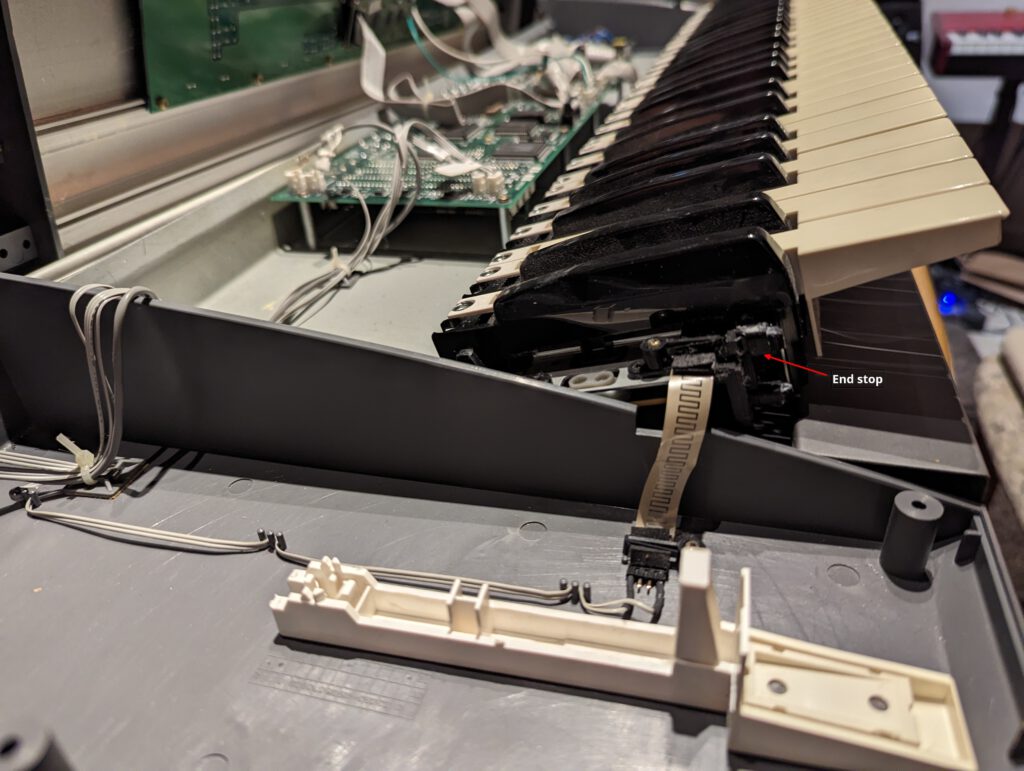 case opened from the side with unmounted keybed, detached key and marked end stop on release
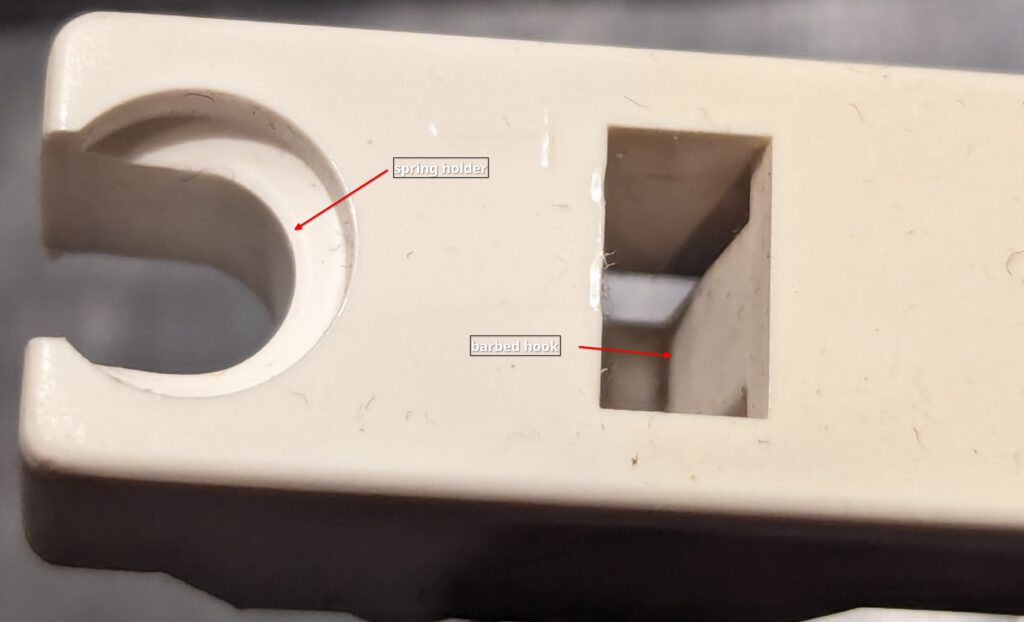 backend of a key with the spring holder and the opening to the barbed hook
 backside of the key backend
- As damping material I used some fleecepads (around 1-2mm thick) I bought at our local hardware store which already came with applied adhesive tape. I just had to cut it into small pieces (around 5x7mm, your mileage may vary), remove the cover of the tape and stick it to the right position.
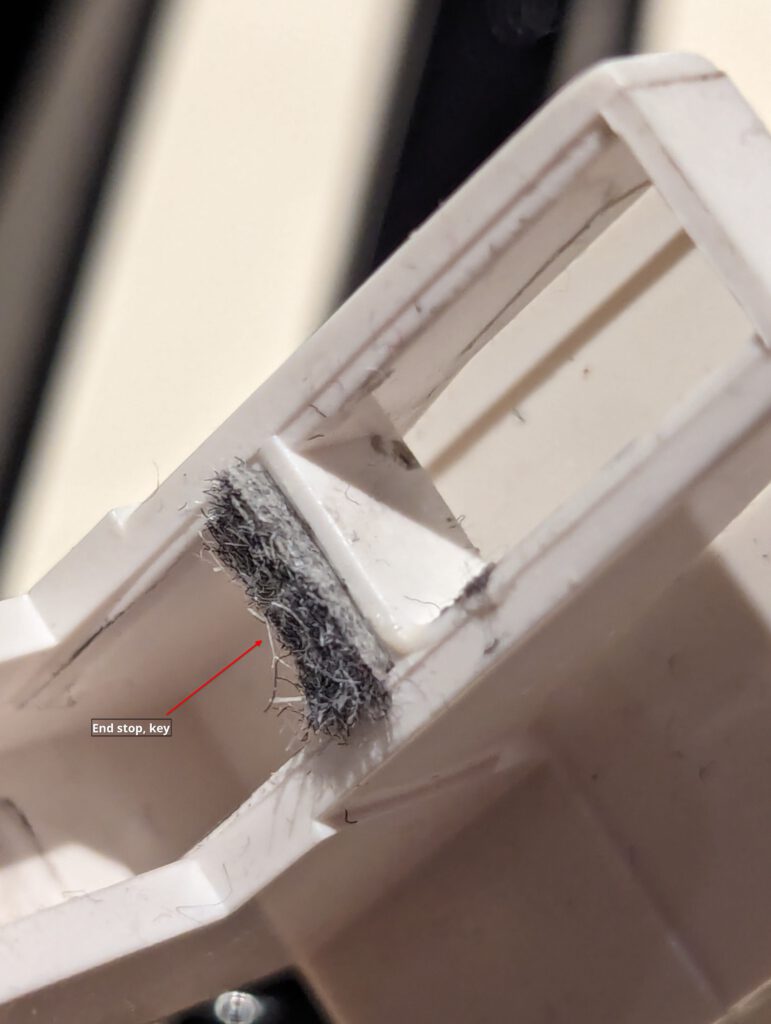 the part of the key wich contacts the end stop with applied fleece
- Now you can put the key back in place carefully (don’t remove the fleece again by rubbing it off somehow), klicking in the hook and reapply the spring.
- Test it by comparing an undamped key with the just freshly damped key. In my case, the result is marvelous!
- As a last step, I applied a longer part of the above-mentioned adhesive insulating tape on the inside of the enclosure back plate under the keybed betweent the keybed mount screws.
- If all is to your liking, remount the keybed, close the housing carefully, reattach the screws and have fun!
This article should be applicable also to the E-MU PK-6 and MK-6 variants, as they are technically the same only differing by name, used enclosure design colors and most importantly the used factory soundrom (so my daughter’s is now more of a PK-6).