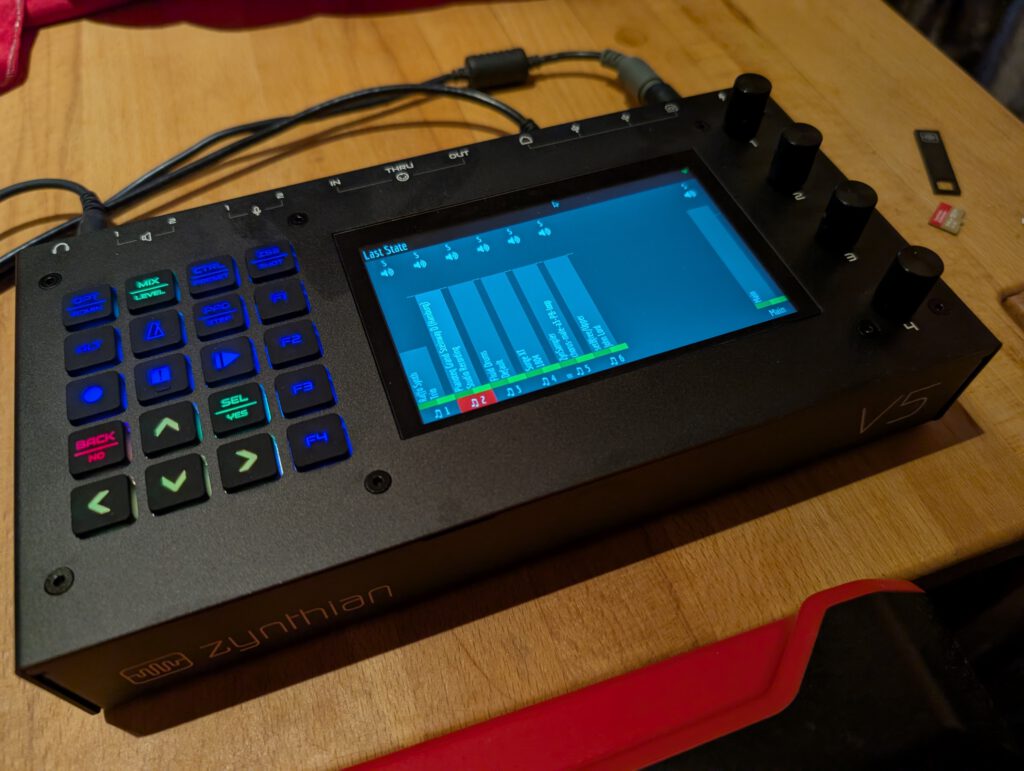
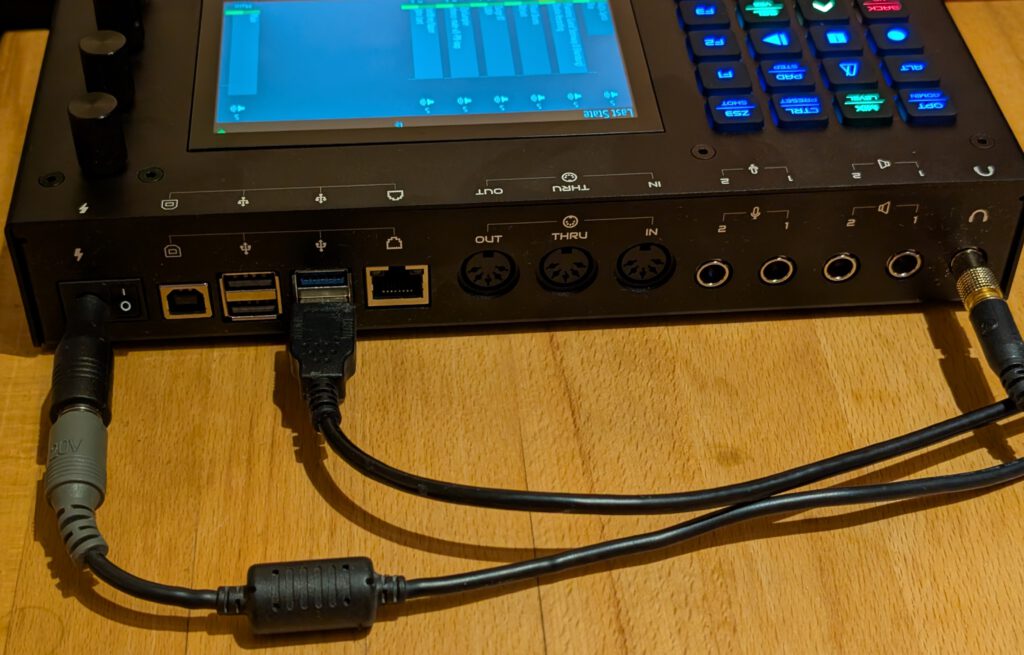
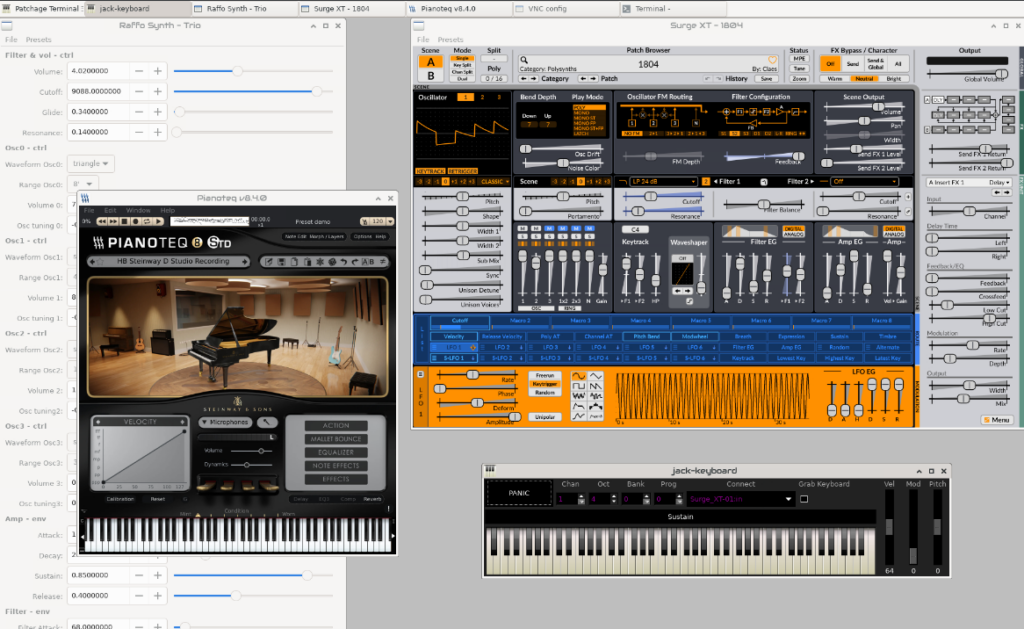
Die Gedanken sind frei…

Zynthian

It’s this special time of the year again where we have time to fiddle with things that came to us and/or we are interested in.

For me a Zynthian v5.1 assembly kit became the target of this years focus. (For now, think of it as musical Lego for grown-ups.)
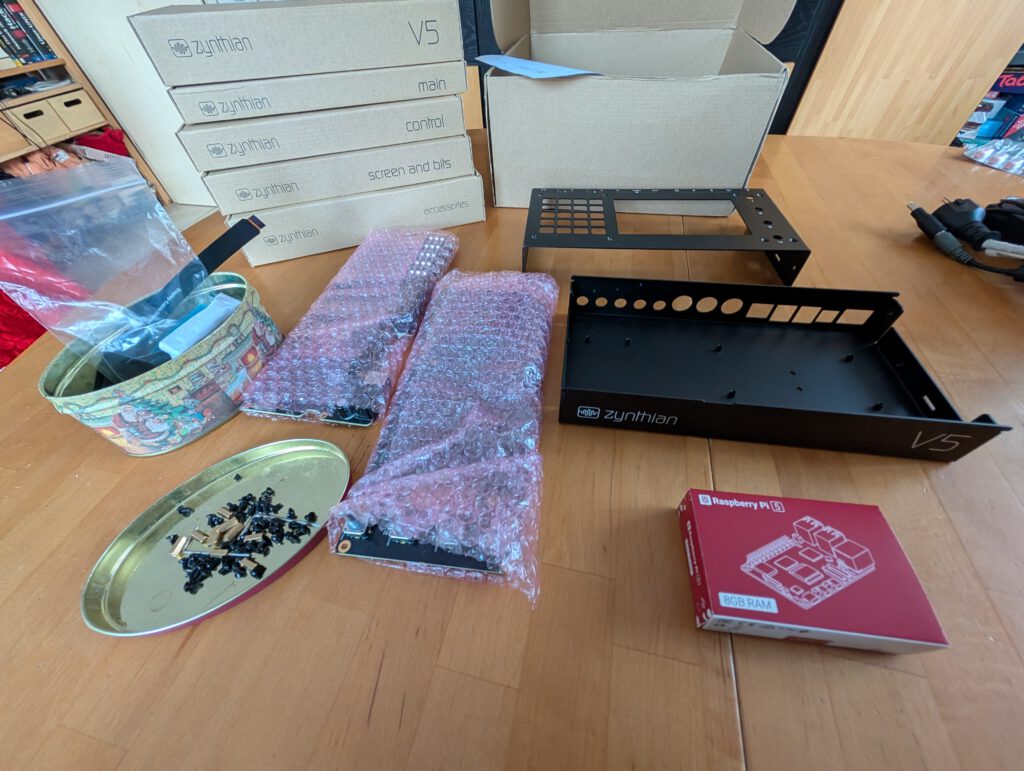
So, what really is a “Zynthian”?

A Zynthian is an embedded Linux system (based on Raspian Linux), specialised for music related tasks, with MIDI and balanced audio I/O among others. And it’s open source, not just the software, but also the hardware. It consists of a vast collection of modules/engines (currently)
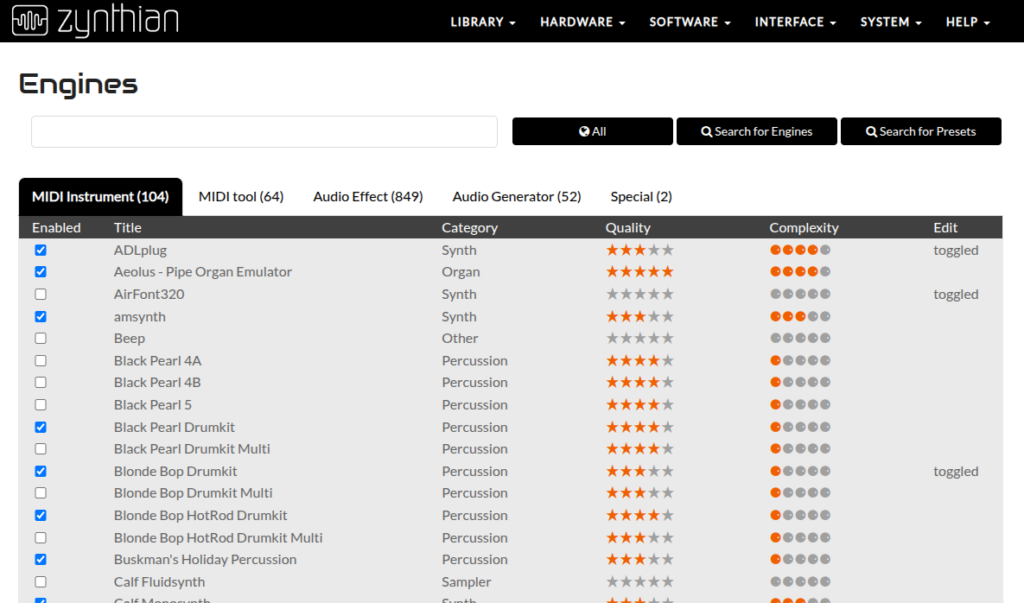
most of which are open source, but you’ll also find the possibility to run Pianoteq (in a test version or activating your license) or even a DSP56300 emulator (which enables you to start i.e. the firmware of an Access Virus if you are entitled to use it), lots of open source audio and midi effects, loopers, tuners, mod-ui, pure data etc. and even an integrated internet radio.

Checkout the Zynthian Website yourself, the feature list is vast and it doesn’t make sense to repeat here every single feature, except the most important.

Think of it as a multi sound expander, multi effect, mobile sequencer/DAW, live looper, tuner, metronome, internet radio [what ever you can think of and implement].

The whole package is a combination of a RaspberryPi, a soundcard and a case with potis, knobs and touch display. If you’re keen on what it feels like without investing lots of bucks you maybe want to start with a testbed, just take an existing RaspberryPi (5 would be the most current and powerful, but 4 would work also with some limitations), add keyboard, mouse, display and a soundcard (USB maybe?) get the bare metal OS, dd it to a µSD and boot! Or if you have an old synth with a good keyboard but otherwise don’t know what to do with it, simply directly integrate a Zynthian! It’s up to you!

As you can see above, the Zynthian also provides a webconf module for updating, managing the available engines and even fire up a VNC version of the regular Zynthian touch display along with another VNC to access the graphical frontends of the currently activated software. Not to mention being able to access the system via ssh.
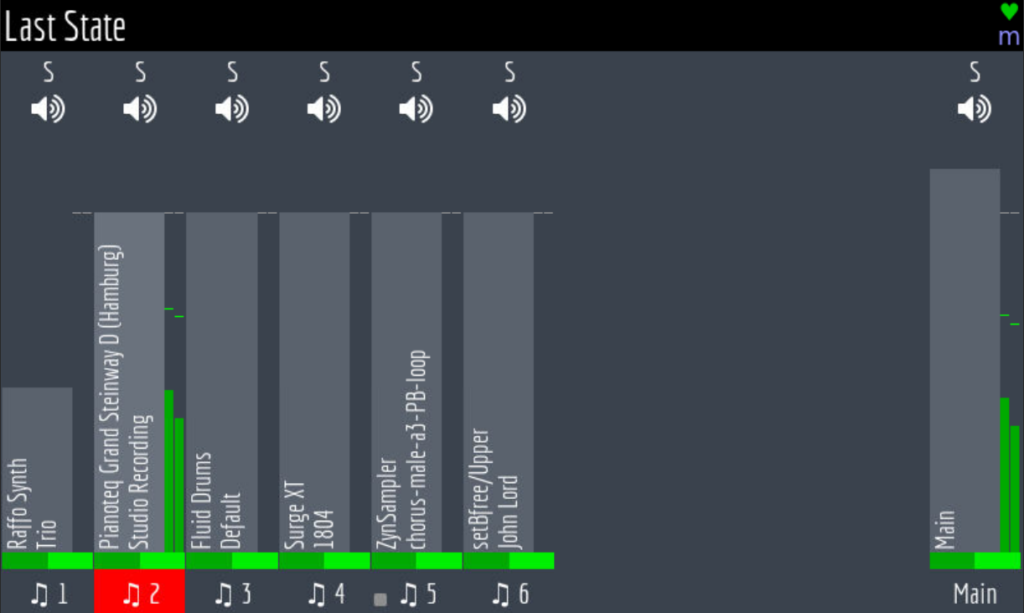
As the RPi also provides USB, WiFi, Bluetooth and an ethernet port you can also attach all sorts of USB devices like soundcards, MIDI interfaces, etc., start a WiFi hotspot, attach i.e. BLE-MIDI hardware, or even use it with MIDI 2.0 (It provides standard MIDI in, out and thru as well of course)!

For those of you having struggled with setting up a Linux audio system based on Jack Audio Connection Kit (the de facto standard for implementing pro audio on Linux), Zynthian comes with a pre-built environment with Jack already running.

So you may ask why should I build such a beast by myself? Because I can? 😉

To be honest, there are commercial products nowadays which cover similar functionality in parts, but most of them are much more expensive while definitely not being as flexible and extensible as a Zynthian. And most important, they normally are neither open source nor open hardware.

One of the best things about a Zynthian is the active community, which not only provides support but also responds to bugs and suggestions for enhancements. And that means it is a system that is constantly evolving and reinventing itself to push the boundaries of what is possible! And you as a user are able to participate!

Out of the box, Zynthian is intended to start from a µSD card, but as I used a RasberryPi5 (with 8G of RAM) I could also add a NVME hat, perfectly fitting into the case for being able to boot from an attached 1TB NVME card. By using a script from one of the devs, I was able to simply copy the contents of the µSD to the NVME and boot from it. So now I’m able to have a stable version (ORAM) for regular use on the NVME and if I want to test bleeding edge I simply can insert and boot from a µSD with the testing (VANGELIS) version of Zynthian.

I fixed the NVME hat in the case by attaching two 5mm spacers to the hat by screws and afterwards used superglue on the other (case) end of the spacers to glue them to the case.

If you plan on assembling a v5.1 kit, decide before if you maybe want to use a NVME hat in the future. It’s definitely a lot easier to connect the needed flat cables during initial setup than doing it later in an assembled state. Ok, you can still disassemble the whole unit and redo all the steps (take care for new thermal pad in this case to ensure an optimal thermal flow between heat sink and case), but the best advice during the assembly also applies here: Think twice before each step!

But being able to do this is one of the advantages of the delivery form as assembly kit (besides understanding how it works and being able to fix things yourself).

BTW: I reused an old Lenovo power supply with a suitable adapter for providing the needed power. The integrated power supply in the Zynthian takes between 12V and 48V, so the 20V are sufficient and the Lenovo power supply provides enough headroom (in Amperes) for attaching USB powered devices as i.e. my Akai MPK 225.

The heatsink provided by the v5.1 assembly kit ensures a thermal flow from the heat generating parts of the RPi5 to the aluminium case of the Zynthian to avoid the need of a fan wich works quite good. The result is a silent system not getting overly hot during normal usage compared to my bare metal RPi5 testbed with a dedicated heatsink with intgerated fan which works with comparable workload at a clearly higher temperature.

Akai MPK225

MIDI controller with keyboard

  • 25 semi-weighted keys, velocity-sensitive and with aftertouch
  • 2 wheels for pitch and modulation
  • 8 pads, velocity-sensitive and with aftertouch,
    virtual 32 pads, divided into 4 banks
  • 4 buttons and 8 endless rotary encoders,
    virtual 12 buttons/24 knobs divided into 3 banks
  • 6 buttons for transport control
  • Arpeggio
  • 2x Octave shift
  • 30 storage slots to save settings,
    24 of them are preset with settings for various software
  • Connection via USB (4 virtual ports) and/or 5-pin MIDI
  • Jacks for expression and sustain pedal
  • USB bus powered or via mains adapter or power bank
  • On/off switch
  • Dimensions: 48.9cm x 29.8cm x 9.2cm; 2.76kg

25 keys may not be enough for some people, but I also have a Nord Stage 2 88 here (so I have enough keys) and was explicitly looking for something small and mobile enough that I could pick it up on the couch to make some music or take it with me without too much effort when travelling. And that’s exactly what it’s good for.

I am pleasantly surprised by the quality of the device. It makes a stable impression, the potis feel high-quality, buttons and pads are easy to play and the configuration seems logical and simple while being versatile and flexible.

The manual is sufficient and detailed for most things, but not quite complete.
The description of the SysEx functions, for example, is unfortunately very rudimentary; it only describes that there is a menu item with which you can transfer all or a single preset via MIDI SysEx. There is no indication of what you can do with it, whether and how you can play it back (you can), let alone an indication that SysEx is only transmitted on the 4th of the logical USB MIDI ports (and not via 5-pin). A complete SysEx documentation is unfortunately also missing as well as a one for the sysex file format.

As far as the 24 included presets are concerned, various well-known and less well-known names are represented here. Of course, once again no representative from the Linux / Open Source world. But that doesn’t hurt. Ardour, for example, already includes a map for the MPK225 that works on the basis of the Bitwig (#6) preset. For further modifications, I copied the Bitwig preset to 25 and took the opportunity to rename it to Ardour.

Now you will very quickly get annoyed by having to switch to preset 6 (Bitwig), let alone 25, every time you switch on. By default, preset 1 (Ableton) is loaded first. But there’s a workaround: copy preset 1 (Live Lite) to #26 and #25 (Ardour) to #1 and it will be loaded right after switching on.

The potis on #6 are set to Inc/Dec2 mode by default and therefore output 0 or 127 depending on the direction of rotation. I have changed this to CC so that I can approach the values between 0 and 127 accordingly. It also works better with software such as Surge XT.

If you don’t want to lose anything, you can also simply save all 24 presets individually via SysEx and thus have all 30 slots available in the MPK225. The number in the computer is only limited by the available memory anyways.

By the way: the size of a preset is 1555 bytes (approx. 1.5kB).

The transport buttons offer the usual functions Play, Stop, Record, <<, >> and additionally Loop. Ardour can be easily controlled from the MPK225.

I have also included the loop button in the supplied map for Ardour and adapted the function assignments of the << and >> buttons from FRW and FFW to start and end, as this is more in line with my requirements.

As I’m using Linux, here are a few useful tools that are helpful in everyday life with the MPK225:

A MIDI monitor is useful for quickly checking which MIDI parameters a particular controller is sending. I start the tool of my choice, briefly operate the controller, see directly what it is sending and now know what I need to set in the software. With aseqdump (part of alsa-utils), I initially use aseqdump -l to display the available MIDI ports and then use -p to run it with the desired port, in this case MPK225. Alternatively, I connect the hardware MIDI port to the software MIDI input of e.g. midisnoop via drag and drop (use i.e. qjackctl or qpwgraph), start the recording and the operation and have the same result. More eye candy, but also slower.
* aseqdump -p MPK225 (CLI)
* midisnoop (GUI)

As even the easy check via aseqdump quickly became too time-consuming for me, I took the trouble to start aseqdump once, operated all the keys, pads, buttons and potis across all the available banks once and then simply projected the results onto a photo of the MPK225.


Just a quick look at the PDF and you’re good to go.

The simplesysexxer has proven useful for handling the presets. It can be used to receive, save and send SysEx dumps.
Per default a sent preset is saved to the slot it came from originally as it is stored to the syx file.

If you want to change that before transfer, you’ll have to use a hex editor of your choice.
As of now Akai seems to refuse to support their customers, right after they have paid for the product.
No information on SysEx, except repeating the 2-3 sentences from the manual (for now).
Not even about how to restore SysEx files saved according to the manual…

Please beware, I will not be responsible if you fry your device somehow by wrongly editing the syx file or maybe even by wrong information on this page. If you edit a syx file by hand with a hex editor, I assume you know what you’re going to do!

Ok, let’s see what I have for now:

A SysEx file is always enclosed by F0 (byte 0x00) and F7 (last byte).
The next two bytes (bytes 0x01-0x02) designate the manufacturer code which in our case means 47 00 (Akai).
Following the manufacturer code we’ll find the device code (byte 0x03): 23 for the MPK225 (24 for MPK249 and 25 for MPK261)
The storage slot is saved in the 8th byte (byte 0x07): 1-30 possible storage slots converted to hex means choose between 01-1e.
The next 8 bytes contain the preset name in ASCII.

That’s it for now.
If I’ll find out more, I will update the article.

Additional links:

https://practicalusage.com/akai-mpk261-mpk2-series-controlling-the-controller-with-sysex/

https://practicalusage.com/akai-mpk261-one-more-thing/

https://github.com/nsmith-/mpk2

ELAN 0634 touchpad in Lenovo ThinkBook 14iil not working under Linux

After having bought a Lenovo ThinkBook 14 iil for my daughter, I found that the touchpad wasn’t recognized during Linux (Opensuse Tumbleweed) install. I continued by plugging in a USB-mouse I had lying around. Unfortunately the problem persisted after having completed the installation.

I googled the problem and found multiple mentions for several linux distributions. As a reference I provide here the link to the Ubuntu launchpad which helped me most in getting things to work under Opensuse Tumbleweed:

https://bugs.launchpad.net/ubuntu/+source/linux/+bug/1861610

For a record it should be mentioned, that this is a BIOS bug which originally should be fixed by Lenovo. As the touchpad works under Windows, this means they have fixed the driver instead… Awkward.

These are the steps I needed to do, to get the touchpad recognized:

Get ACPI table:

acpidump -b

Disassemble ACPI table:

iasl -d dsdt.dat

Edit DSDT:

vi dsdt.dsl

  • Search the HID of the touch pad: ELAN0634
  • Search the next _STA method declaration
    and comment out these four lines:

Method (_STA, 0, NotSerialized) // _STA: Status
{
//If ((TPVD == 0x45))
//{
Return (0x0F)
//}
//Return (Zero)
}

  • Increment the version number. It’s the last parameter of the DefinitionBlock (line 21 for me):
    DefinitionBlock ("", "DSDT", 2, "LENOVO", "ICL ", 0x20170002)
  • save

Compile DSDT:

iasl -sa dsdt.dsl

Copy compiled DSDT to /boot for easy loading by grub:

cp dsdt.aml /boot

Reboot, press e in grub menu on your linux boot entry and enter the following line before kernel loading:
acpi /boot/dsdt.aml
(Secure boot has to be disabled in BIOS!)

If the workaround works for you, add the line in /boot/grub2/grub.cfg in the relevant boot entry for getting the fix on each reboot.

As this is just an ugly (albeit working) workaround, I opened a bug request on opensuse bugzilla for getting it fixed in the standard kernel without having to meddle with the DST in the future:

https://bugzilla.opensuse.org/show_bug.cgi?id=1176971

Posted in IT

Umbenennen einer Dateinamensliste

(Umsetzung unter Linux/bash)

Problem:
Eine längere Liste mit Dateinamen der Art Kategorie1_Kategorie2_Kategorie3_Dateiname.txt soll jeweils in Dateiname.txt umbenannt werden.

Eine manuelle Umsetzung würde Stunden brauchen.

Lösung:
Man lässt eine kleine for-Schleife drüber laufen welche die Kategorien mittels pattern matching entfernt.

Die bash bringt die entsprechende Funktionalität schon mit, so dass es recht simpel umzusetzen ist:

for i in ls; do mv $i ${i##*_};done

Erklärung:
for i in ls; # Für jedes Vorkommen i in der Ausgabe des Kommandos ls,
do mv $i ${i##*_};# umbenennen des ursprünglichen Dateinamens $i in eine Variante bei der alle Segmente in i bis zum letzten “_” von links entfernt sind
done # Abschluss der for-Schleife

Beispiele:
${i##*_}alle Bestandteile bis incl. dem letzten _ von links werden entfernt: Dateiname.txt

${i#*_}alle Bestandteile bis incl. dem ersten _ von links werden entfernt: Kategorie2_Kategorie3_Dateiname.txt

${i%%_*}alle Bestandteile bis incl. dem letzten _ von rechts werden entfernt: Kategorie1

${i%.*} alle Bestandteile bis incl. dem ersten . von rechts werden entfernt: Kategorie1_Kategorie2_Kategorie3_Dateiname

Mehr Informationen dazu findet man im bash manual bash manual.

Posted in IT

LaTeX-Beamer

Um ein wenig in LaTeX (ein Textsatzsystem, siehe https://de.wikipedia.org/wiki/LaTeX und https://www.latex-project.org/) drin zu bleiben, habe ich beschlossen die Linux-Schulungsunterlagen (wird die Tage mal einen eigenen Artikel dazu geben) an denen ich arbeite, mit LaTeX zu bauen.

Für die grobe Dokumentstruktur habe ich Freeplane (https://www.freeplane.org/ bzw. https://de.wikipedia.org/wiki/Freeplane) eingesetzt, ein freier Java-basierter Mindmapper mit dem sich die einzelnen Kapitel und Unterkapitel einfach sammeln und strukturieren lassen.

Freeplane

Das Beste daran ist, dass man das Ergebnis direkt in ein LaTeX-Beamer-Dokument (https://de.wikipedia.org/wiki/Beamer_(LaTeX)) exportieren kann, das dann “nur” noch etwas verfeinert und mit Inhalten gefüllt werden muss. 😉

Das Ergebnis ist dann eine PDF-Präsentation mit einheitlichem, konsistentem Look&Feel die praktisch überall wo ein PDF-Viewer installiert ist genutzt werden kann.

Addendum:

Um das Thema \LaTeX noch etwas auszudehnen, man kann (unter Nutzung des “WP LaTeX”-Plugins) auch – wie man sieht – in WordPress \LaTeX einsetzen indem man z.b. $ latex \LaTeX&bg=161617&fg=3399cc&s=4$ eingibt (und das Leerzeichen nach dem ersten $ wieder entfernt).

Das ergibt dann: \LaTeX

Mehr Info dazu findet man z.B. hier.